www.lovesissy.com
  • Home
  • Walls
  • Accessories
  • Furniture
  • My Story
  • Asher
  • Olivia
  • FreeArtFriday

Rustic Tableware

11/26/2012

1 Comment


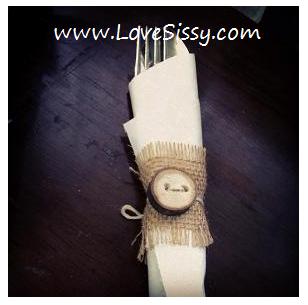
DIY branch button napkin rings

Picture

First, Burlap

Cut a 4" x 2" piece of burlap.

Picture
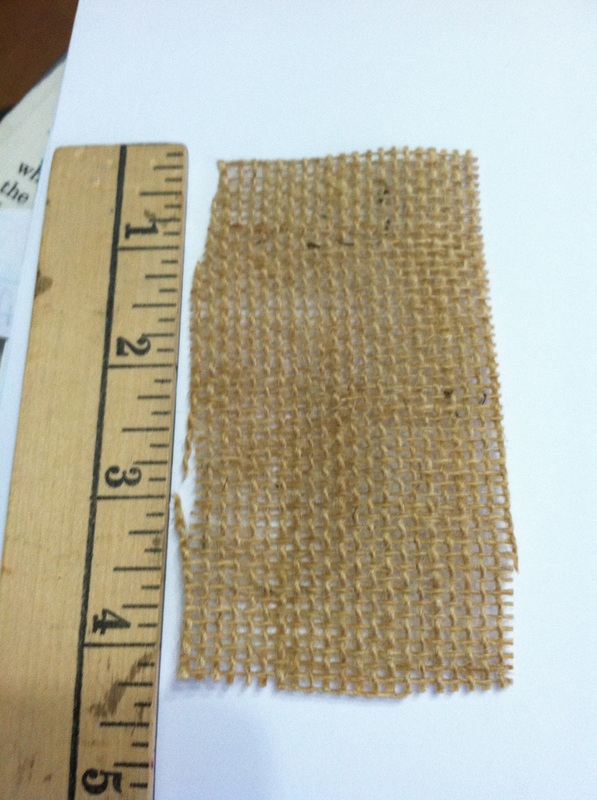
Pull a couple strings out on each of the four sides . 
Picture
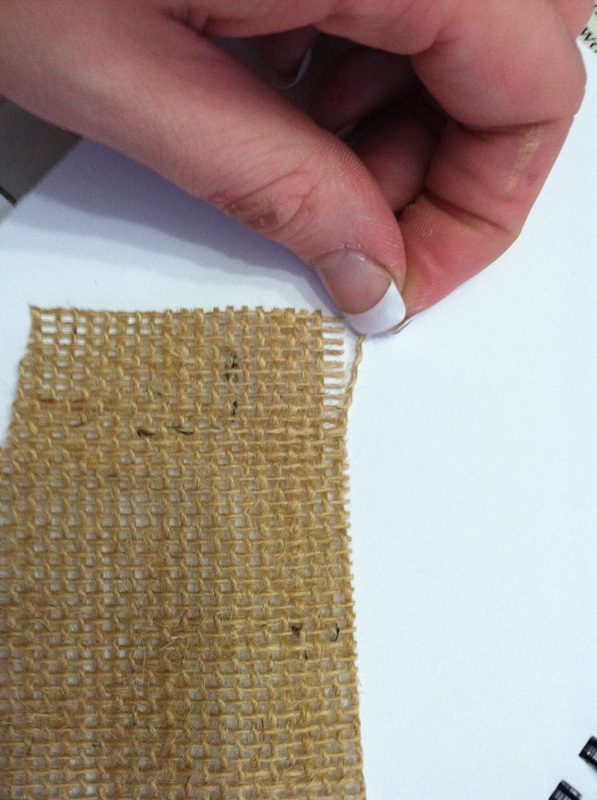
This will give you cute frayed edges.
Picture

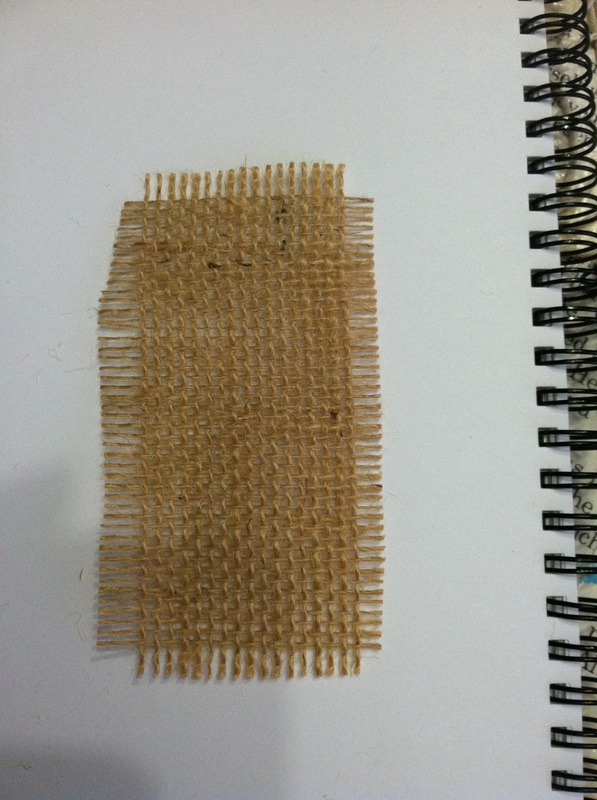
Next, tree branch button

Slice a button sized tree branch (about 1" in diameter) using a band saw. Make extras. Some will break or won't be even. 
Picture
Drill two holes into each slice.
Picture
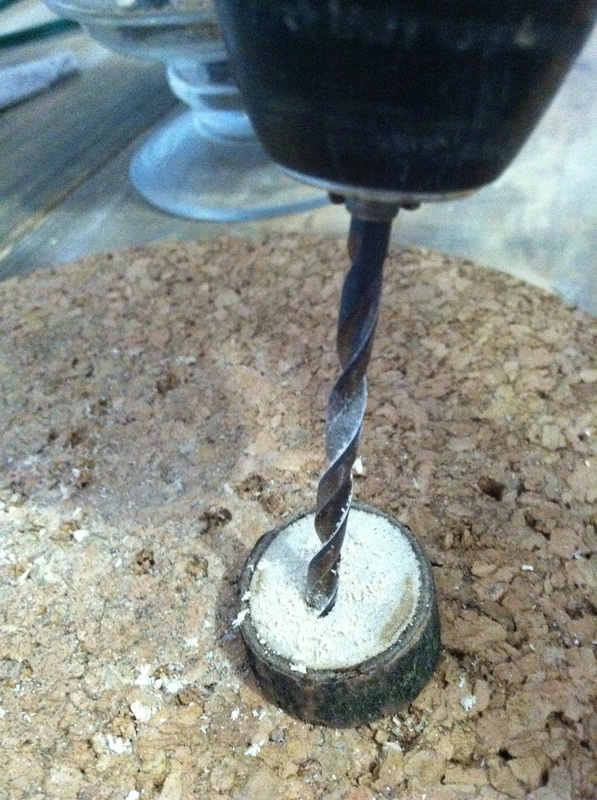
Or buy them on ETSY.
Picture

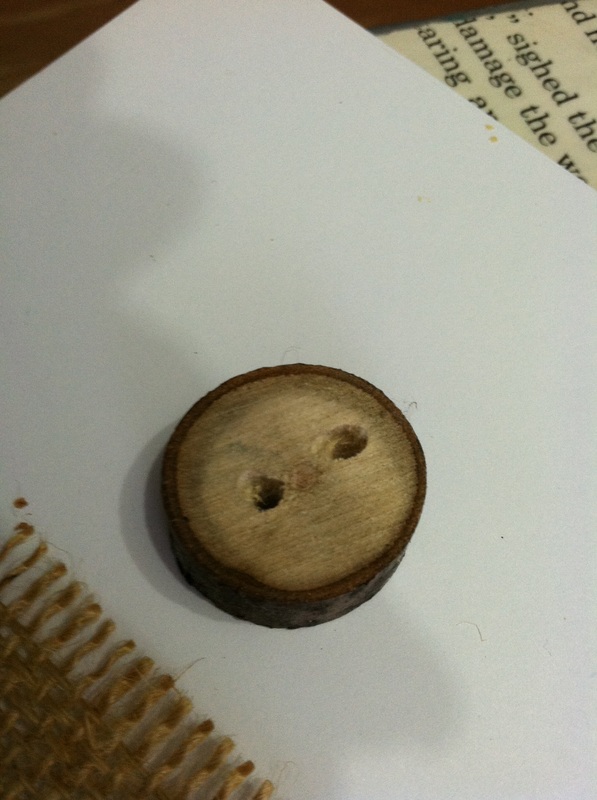
Finally, string it all together

Cut a 12" piece of string, hemp, or twine & thread it through your button. (You could use any button--not just a tree branch button.)
Picture
If the ends of your string aren't fitting through the holes, rub a glue stick on them & twist between your fingers. Works every time!
Picture
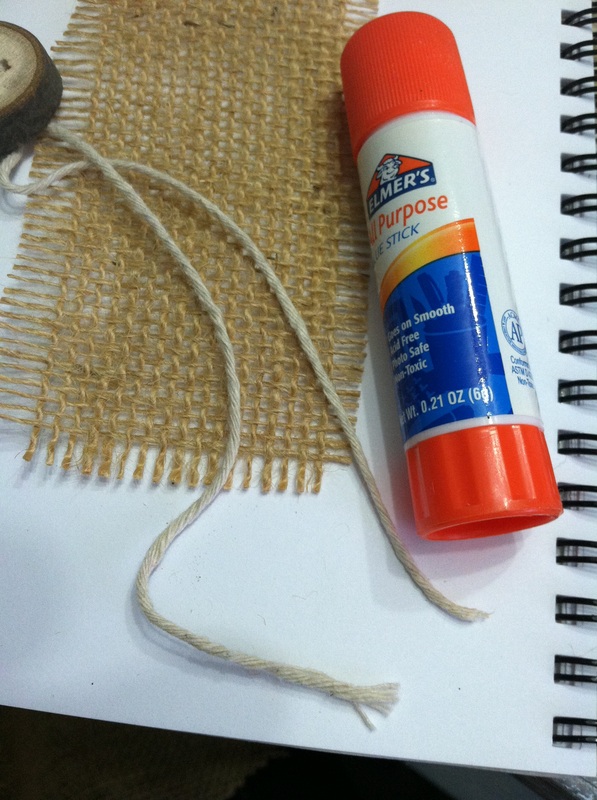
Roll your silverware in a napkin, wrap stringed button around the burlap around the silveware  & tie a bow on the backside of the silverware roll.
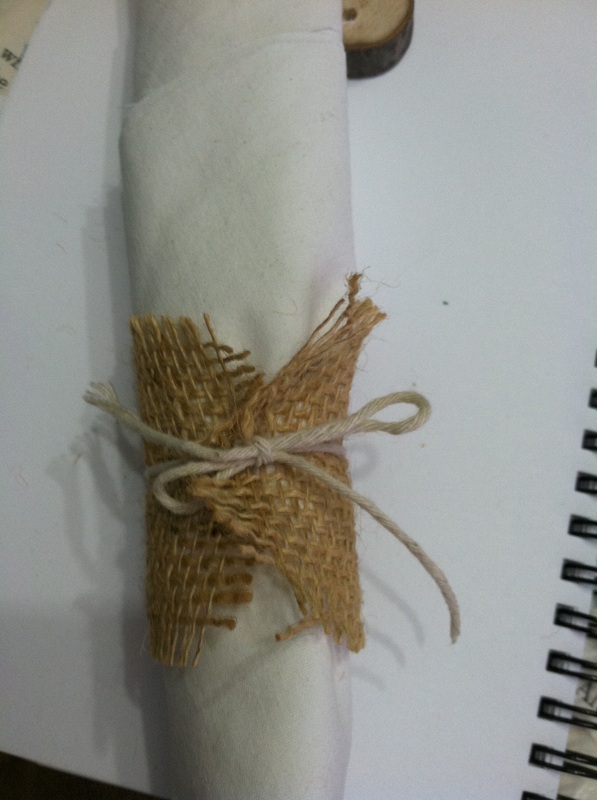
Picture
1 Comment

Repurpose: Chairs to Stools

11/25/2012

4 Comments

 
Stools are very versatile. They can be used as extra seating or as ottomans. They can be used at desks or vanities & they are compact and are easy to store & tuck away. Use them at the end of a bed in a bedroom or near a door to have a place to sit & put on shoes. Some people use them as pet beds & position them under windows to give your furry buddy a sunny spot to nap. 
Picture

Here's how you do it...

Flip the chair over, find & remove any screws holding the backs in place. Remove back (pull or use a hammer), paint chair base, add foam & upholster the top (or leave without padding or upholstery).

Here are some finished projects...

Picture
Picture
Picture
Picture
Picture
Picture
Picture
Picture
Picture
4 Comments

How To: T-Shirt Bags

11/25/2012

2 Comments

 
SO easy & absolutely no sewing necessary. These bags can be washed & take up very little room so it's easy to keep them in your glove box or under the seat of your car for shopping trips.

No Sew T-Shirt Bags

Picture

Just a little sewing t-shirt bags

Picture
Picture
2 Comments

How to: Fabric Flowers

11/25/2012

3 Comments

 
Picture
This is simple & quick. Use these for hair clips, head bands, to embellish throw pillows or blankets, or as cute bows on gifts. When using a hot glue gun, wear thick gloves to protect yourself from burns.

Click on the picture below to enlarge:
Picture
Picture
3 Comments

Repurposing Crates

11/25/2012

1 Comment

 
Picture
Shipping (& other types of) crates make a great base material to work with. They're really sturdy, you can often find them free or for very little money, & they add instant character & storage to a space. 


Crate Project Ideas:
Picture
Picture
Picture
Picture
Picture
Picture
Picture
Picture
Picture
Picture
Picture
Picture
Picture
Picture
Picture
Picture
Picture
Picture
Picture
Picture
Picture
Picture
Picture
Picture
Picture
Picture
Picture

How to Add Drawers to a crate

You can take the drawers & drawer parts from another piece of furniture & can modify & add those parts to a shipping crate to give it more functionality & storage.
Picture
Picture
1 Comment

How To Age Wood

11/25/2012

0 Comments

 
Picture
Soak steel wool in a jar of vinegar for a day or two. Then, put that concoction over any type of unfinished wood. Some type of chemical reaction happens (Science isn't my thing) to give it an aged look. To further age it, beat the heck out of the wood w/ a hammer or any old object laying around, drop the wood, kick it, etc. You can also use a dry brush to lightly add "old paint" to it.

A more labor intensive way to age wood would be to think about all the finishes it would've had if it were genuinely 50 years old. It would've been sanded & stained first.  Then, banged up A LOT & when it was good and banged up someone would've primed then painted it. Then over the years it would've been painted & repainted.  And finally, it would've been banged up more with a lot of wear on the edges, around knobs, etc.  So follow that pattern--sand it, stain it, beat it up, prime it, paint it, paint it, paint it, paint it, beat it up, use a sander to add wear to commonly touched areas & edges.  

Picture
0 Comments

Reclaimed Wood, Pipe Leg Tables

11/24/2012

3 Comments

 
Picture
Plumbing parts are Legos for adults. There are so many different shapes, sizes, & pieces that you can use to make legs for any type of table. The key is to add support bars or increase the width of the pipe you use as the weight of your table-top increases for stability. Plumbing parts aren't the cheapest legs out there, but they're certainly not the most expensive & they look really cool! 

First, here are the basics...

Picture

Step by Step

First, 

Gather old wood & cut all of the pieces (except one--set one aside) to the same length (any length that you'd like your table top to be). Then, cut the piece you set aside into two pieces that are 1-2" less than the width of your table. These will be the support braces that hold the planks together.
 If you can't find old wood, try the bargain bin at the hardware store & use these tips to artificially age it in an afternoon. 

Next, 

Lay your table top plank pieces face down & place the two support braces across the pieces. Put at least one screw (a few more--one in each corner & then a few down the middle is better) into each plank (make sure your screws aren't too long so they don't poke through your table top). Screw plumbing flanges into the table top to attach your plumbing pipe legs.

Finally, 

Screw your pipe legs into the flanges & add finishing touches. use a sticker scraping razor to remove price tags & add plastic feet to keep the table from scratching your floors. 
You can also flip the table over & seal it with wax or polyurethane. 
Picture
Picture
Picture
Picture
Picture
Picture

more wood plank, pipe leg tables...

Picture
Picture
Picture
Picture
Picture
Picture
Picture
Picture
Picture
Picture
Picture
Picture
Picture
Picture
Picture
Picture
Picture
Picture
Picture
Picture
Picture

other (non-pipe leg)

Picture
Picture
Picture
Picture
Picture
Picture
Picture
Picture
Picture
Picture
Picture
Picture
Picture
Picture
Picture
Picture
Picture
Picture
Picture
3 Comments

    THanks!

    Thanks for visiting. Hope you're enjoying the blog. Visit me on facebook if you have a minute. I love new friends.

    Archives

    July 2013
    April 2013
    March 2013
    February 2013
    January 2013
    November 2012
    August 2012
    July 2012
    May 2012

    Categories

    All
    Chairs To Stools
    Dresser To Storage Bench
    Fabric Flowers
    Headboard
    How To Age Wood
    Mod Podge
    Particle Board Redo
    Plank Pipe Leg Tables
    Reclaimed Dining Table
    Repurpose Crates
    Repurposed Furniture
    Repurposed School Desks
    Restoration Hardware Copy
    Rock Lamp
    Rustic Tableware
    Suitcases
    Tee Pee
    Tree Branch Slices
    Tshirt Bag

    RSS Feed

Powered by Create your own unique website with customizable templates.